DCP flow type with software v2
Instead of using Vivado in project file, it is possible to load design checkpoints (.DCP) and work from there with Exostiv Core Inserter in netlist mode of insertion.
Flow
1) No Vivado project file is used or defined.
2) Synthesize your design with the synthesis tool of your choice.
3) Load the synthesized design checkpoint.
4) In netlist mode projhect, use the ‘Vivado button’ to establish a link between Vivado and EXOSTIV Core Inserter.
5) Define EXOSTIV IP structure and nets with EXOSTIV Dashboard (Link Configuration + Capture Configuration).
6) Proceed with EXOSTIV IP insertion, with the following options selected:
– Unselect ‘Implement Design’ nor ‘Generate Bitstream’ in the EXOSTIV Core Insertion flow: Vivado provides two sets of commands for running implementation.
The command set using project (.xpr) is different from the ‘non-project mode’. Exostiv Core Inserter currently includes the ‘project mode’ set of commands, that cannot be used automatically in non-project mode’ (DCP).

7) Run the flow by pressing the ‘Insert EXOSTIV IP’ button.
8) After the end of the process, save your Exostiv Core Inserter project file.
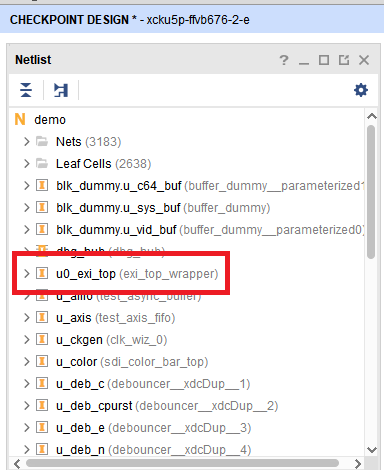
9) From there, the implementation of the instrumented design must be started from the Vivado interface: switch to Vivado. The EXOSTIV IP (instance default name ‘u0_exi_top’) should be inserted in the design.
10) Use the following sequence of commands from the Vivado command line interface:
– Opt_desing
– (optionally: power_opt_design)
– Place_design
– (optionally: phys_opt_design)
– Route_design
– Write_bitstream
Please refer to the Vivado command line /
At the end of this process, you obtain a bitstream file ready to be loaded into your target FPGA. You can then use the probe to run captures.