Search
Exostiv Blade Client Overview
Exostiv Blade Client is the application used to connect to Exostiv Blade units, run captures from connected FPGA boards and manage the collected data.
This client application is complementary to the Exostiv Blade Core Inserter application used to generate and insert Exostiv Blade IP cores.
Exostiv Blade Client uses the project files (extension .bpf) defined with the Exostiv Blade Core Inserter application to retrieve the configuration of specific Exostiv Blade IP cores and connect to them.
Using Exostiv Blade Client usually requires the following steps (click to jump to section):
- Start Exostiv Blade client and load a project file (.bpf extension) relative to a specific Exostiv IP core insertion
- Connect to Exostiv Blade unit and then to the session that matches the project settings
- Run captures from the target board
- Visualize and manage the captured data
Start Exostiv Blade Client and load a project file
At Exostiv Blade Client startup, the welcome screen appears.
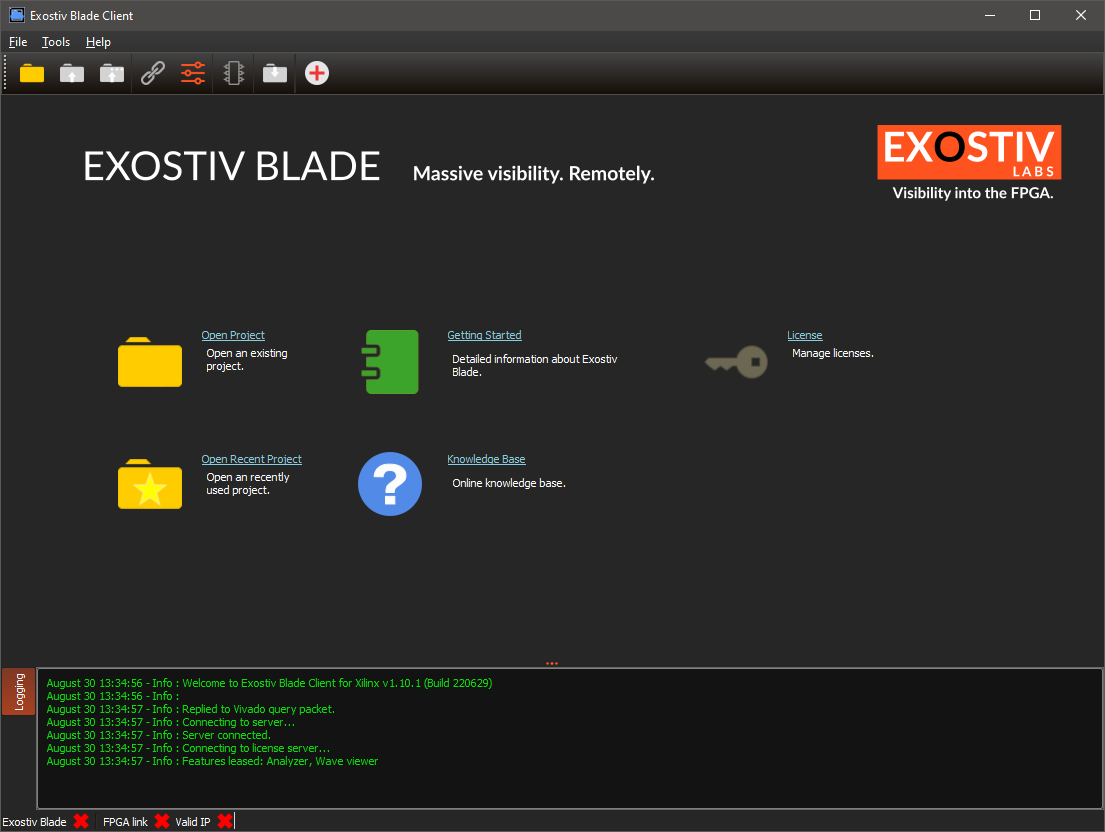
Exostiv Blade Client requires a user license, that is usually leased from an installed license server – please refer to this article to know how.
Click on ‘Open Project’ or use the menu ‘File > Open Project’ to open a project (extension .bpf).
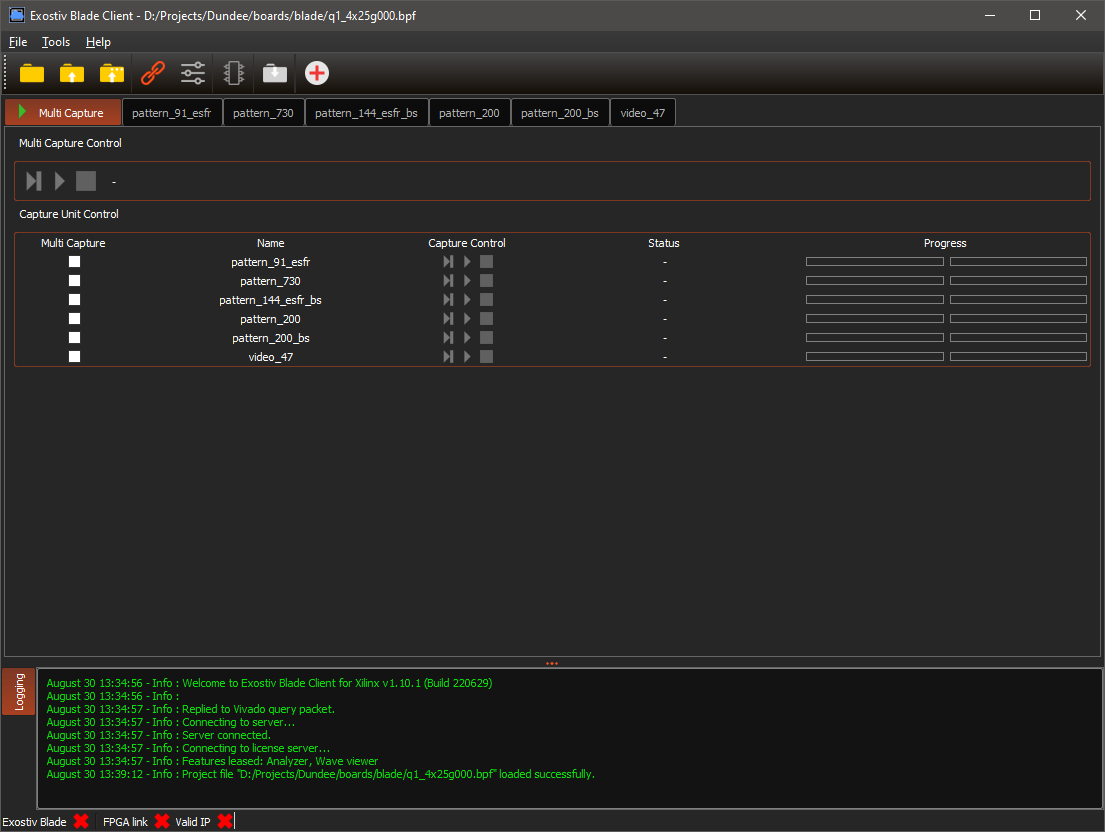
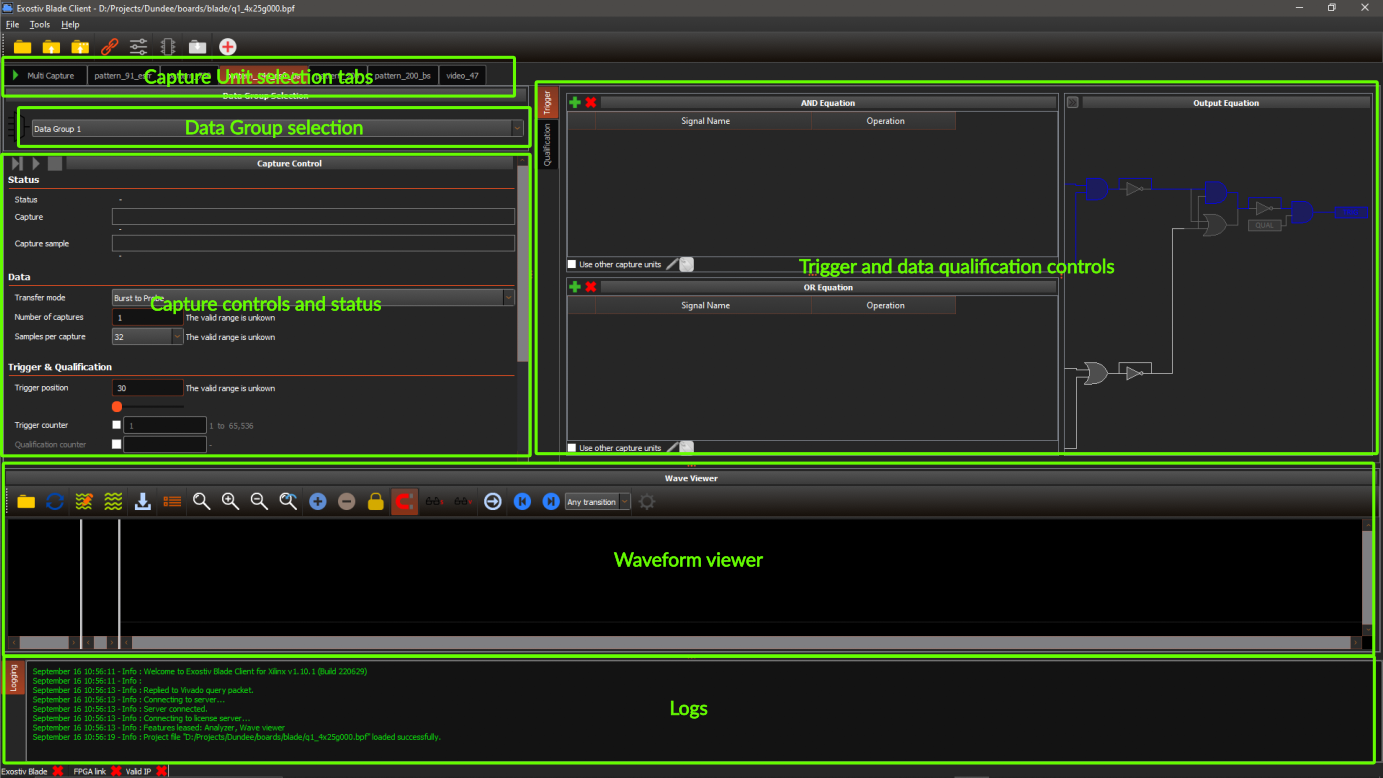
Once loaded, you land on the ‘Multi Capture tab’. This tab provides the controls for captures from multiple capture units (click here for an overview of our IPs).
Connect to a Exostiv Blade unit and to a session
Click on the ‘connect probe icon’ (or go to Tools > Connect Device).
![]()
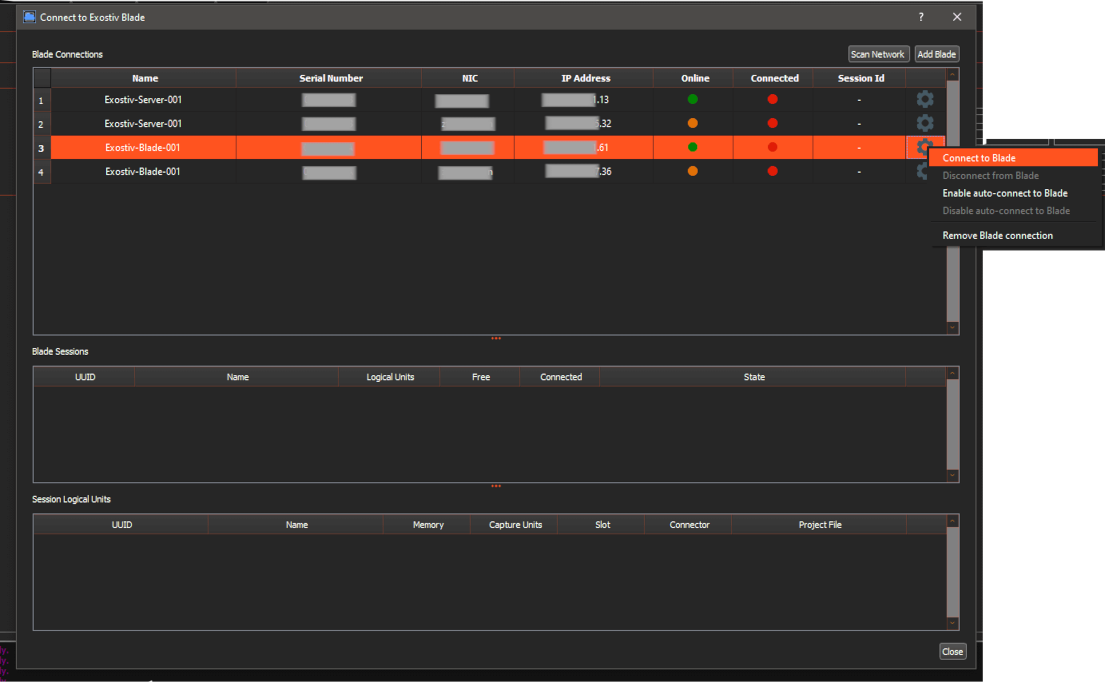
The window that pops up contains a list of Exostiv Blade units present on your network.
The connected Blade units are listed together with their serial number, network adapter name and IP address. A color status is also provided.
To connect to the Blade of your choice, right-click on the gear icon next to it and select ‘Connect to Blade’ in the contextual menu that appears.
Once you are connected to the selected Blade, the list in the lower part of the window gets populated with the available ‘sessions’. You need to select the session that corrrespond to the loaded project file. Right-click on the gear icon next to the chosen session and hit ‘connect to session’.
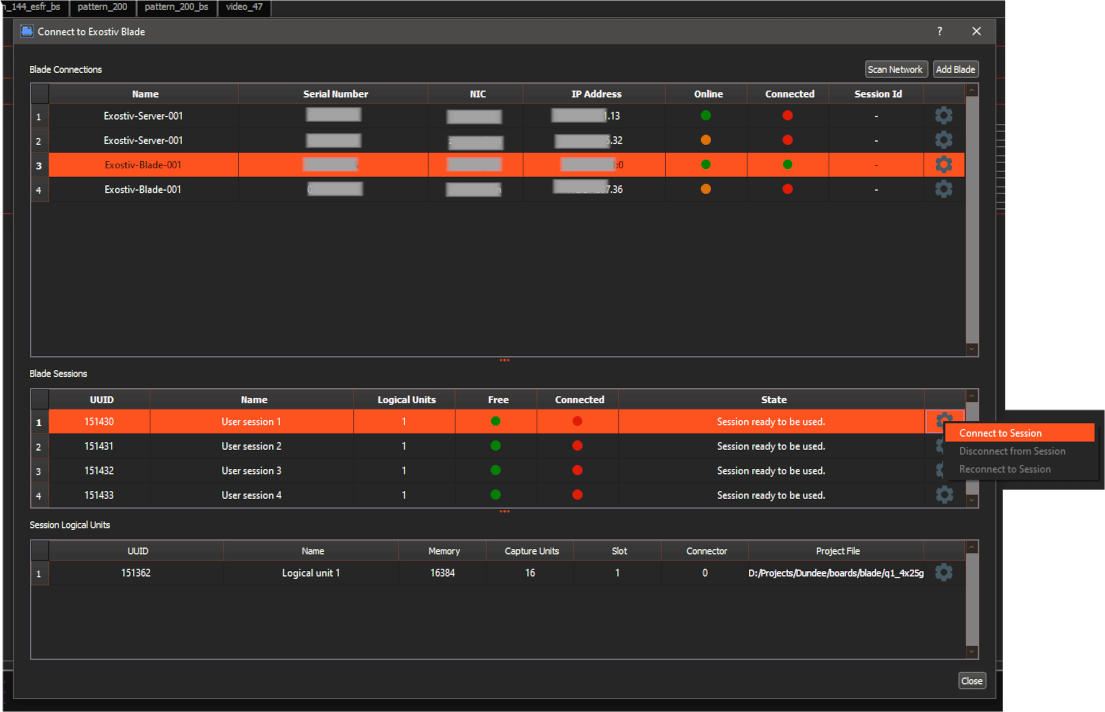
Upon successful connection to the Blade and the session, the session ID is provided, the name of the connected user is reported and the statuses of the Blade and session are updated.
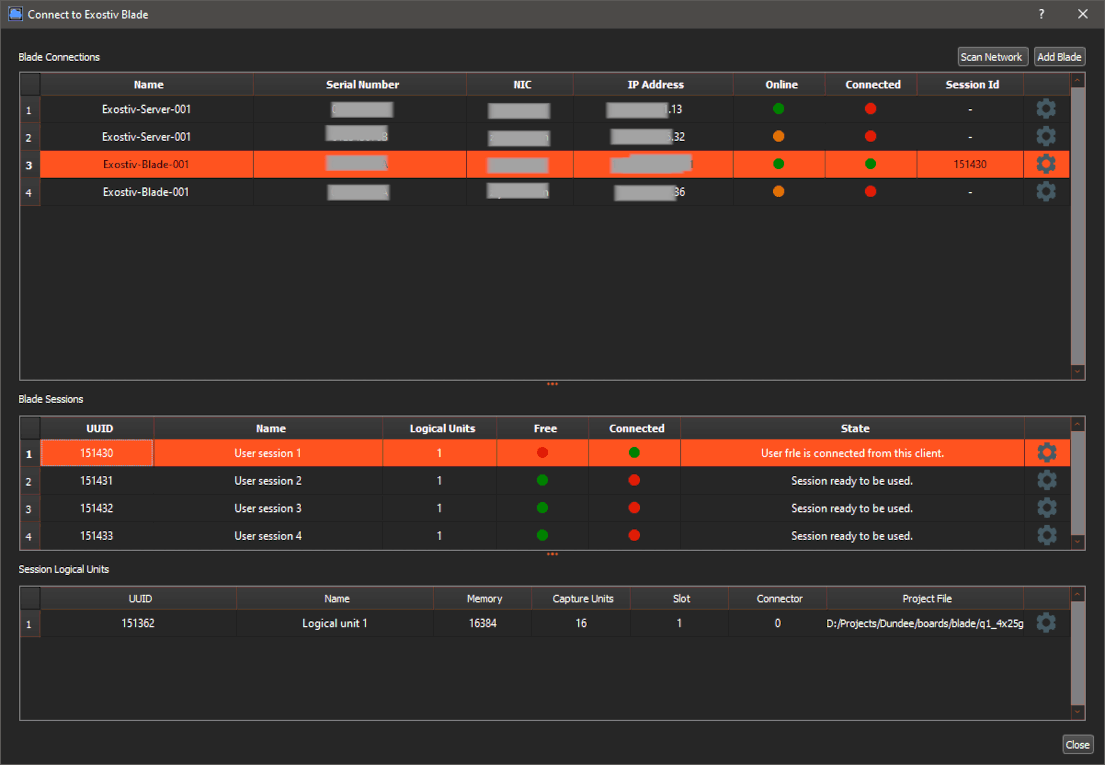
Hit the ‘Close’ button to close the window.
The connected Exostiv Blade will then attempt to establish a link connection with the target board connected to it, according to the project settings.
If the target board is properly connected, the design running (make sure that – notably – the clock is running!) and the design contains the Exostiv IP instance that corresponds to the .bpf project settings, the negotiation succeeds and results in the statuses being updated (all green) at the bottom:

The Exostiv Blade Client is ready to run captures.
Run captures from the target board
Standard IP
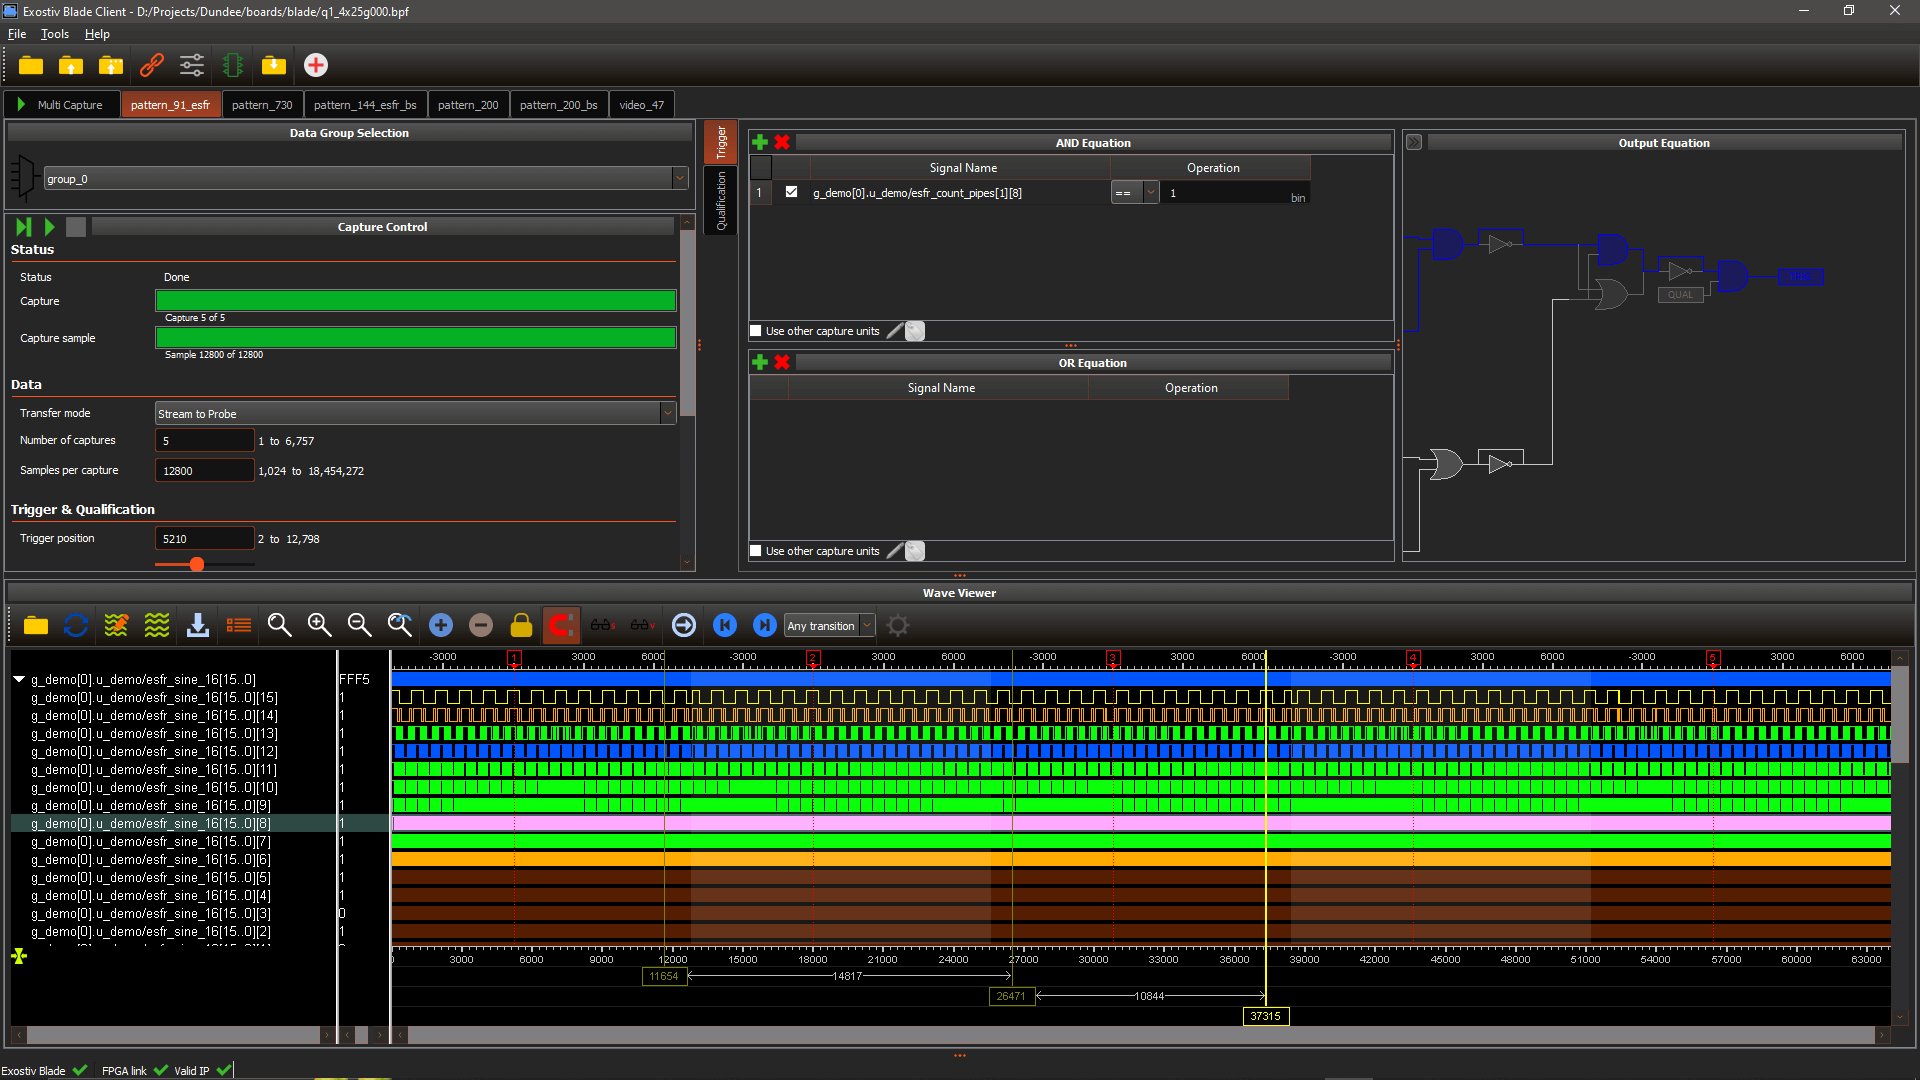
The available controls depend on the IP chosen for capture. The following description is for the ‘Standard IP’. Click here for the ‘Extended width IP controls’ description.
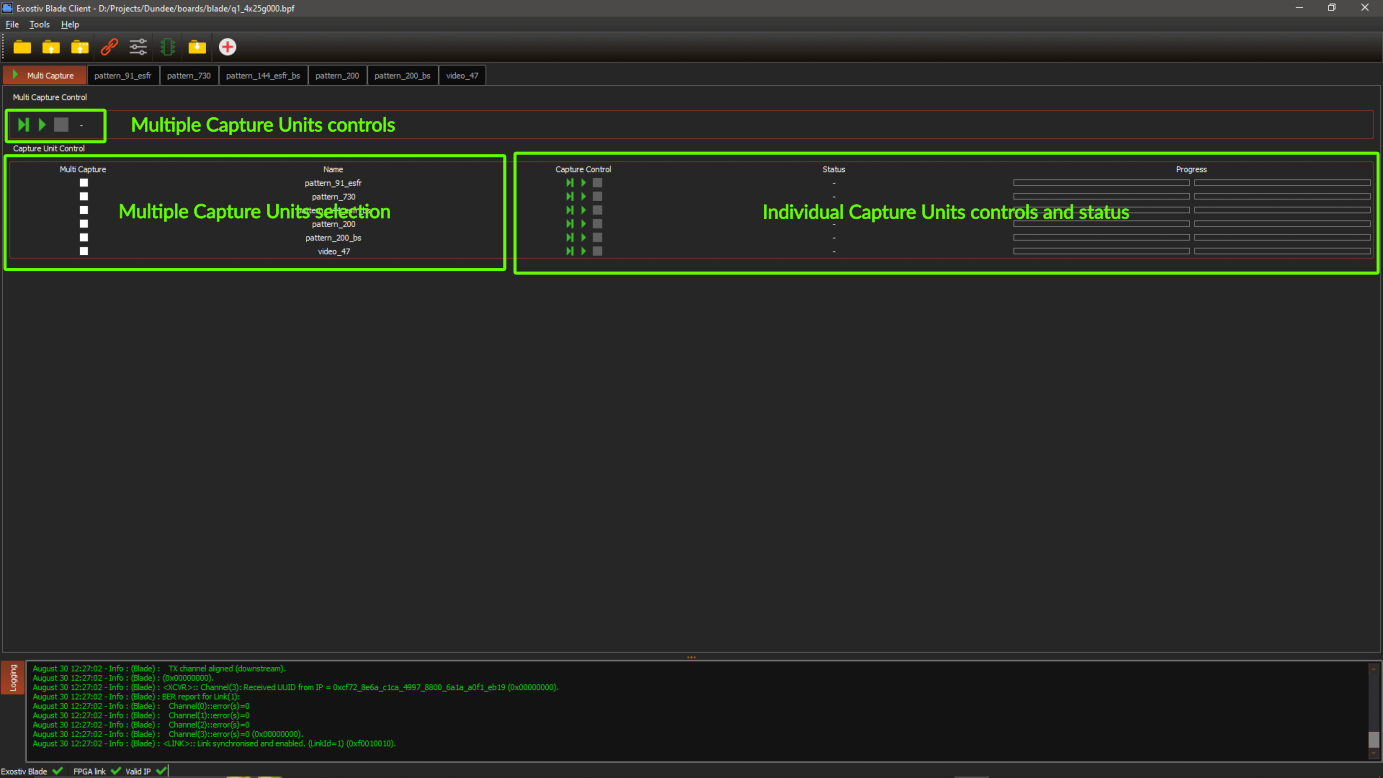
On top of the Exostiv Blade Client, tabs allow switching to each individual capture unit controls or select the ‘multiple cpature units tab’.
With individual tabs, captures are run from the selected capture unit only. The multi-CU tab allows running captures from multiple capture units at once.
(Click to enlarge the pictures)
Extended width IP
- Only 1 data group.
- Trigger on up to 2,048 inputs.
- Sampling up to 109 MHz.
- Streaming mode of capture only.
Visualize and manage the captured data
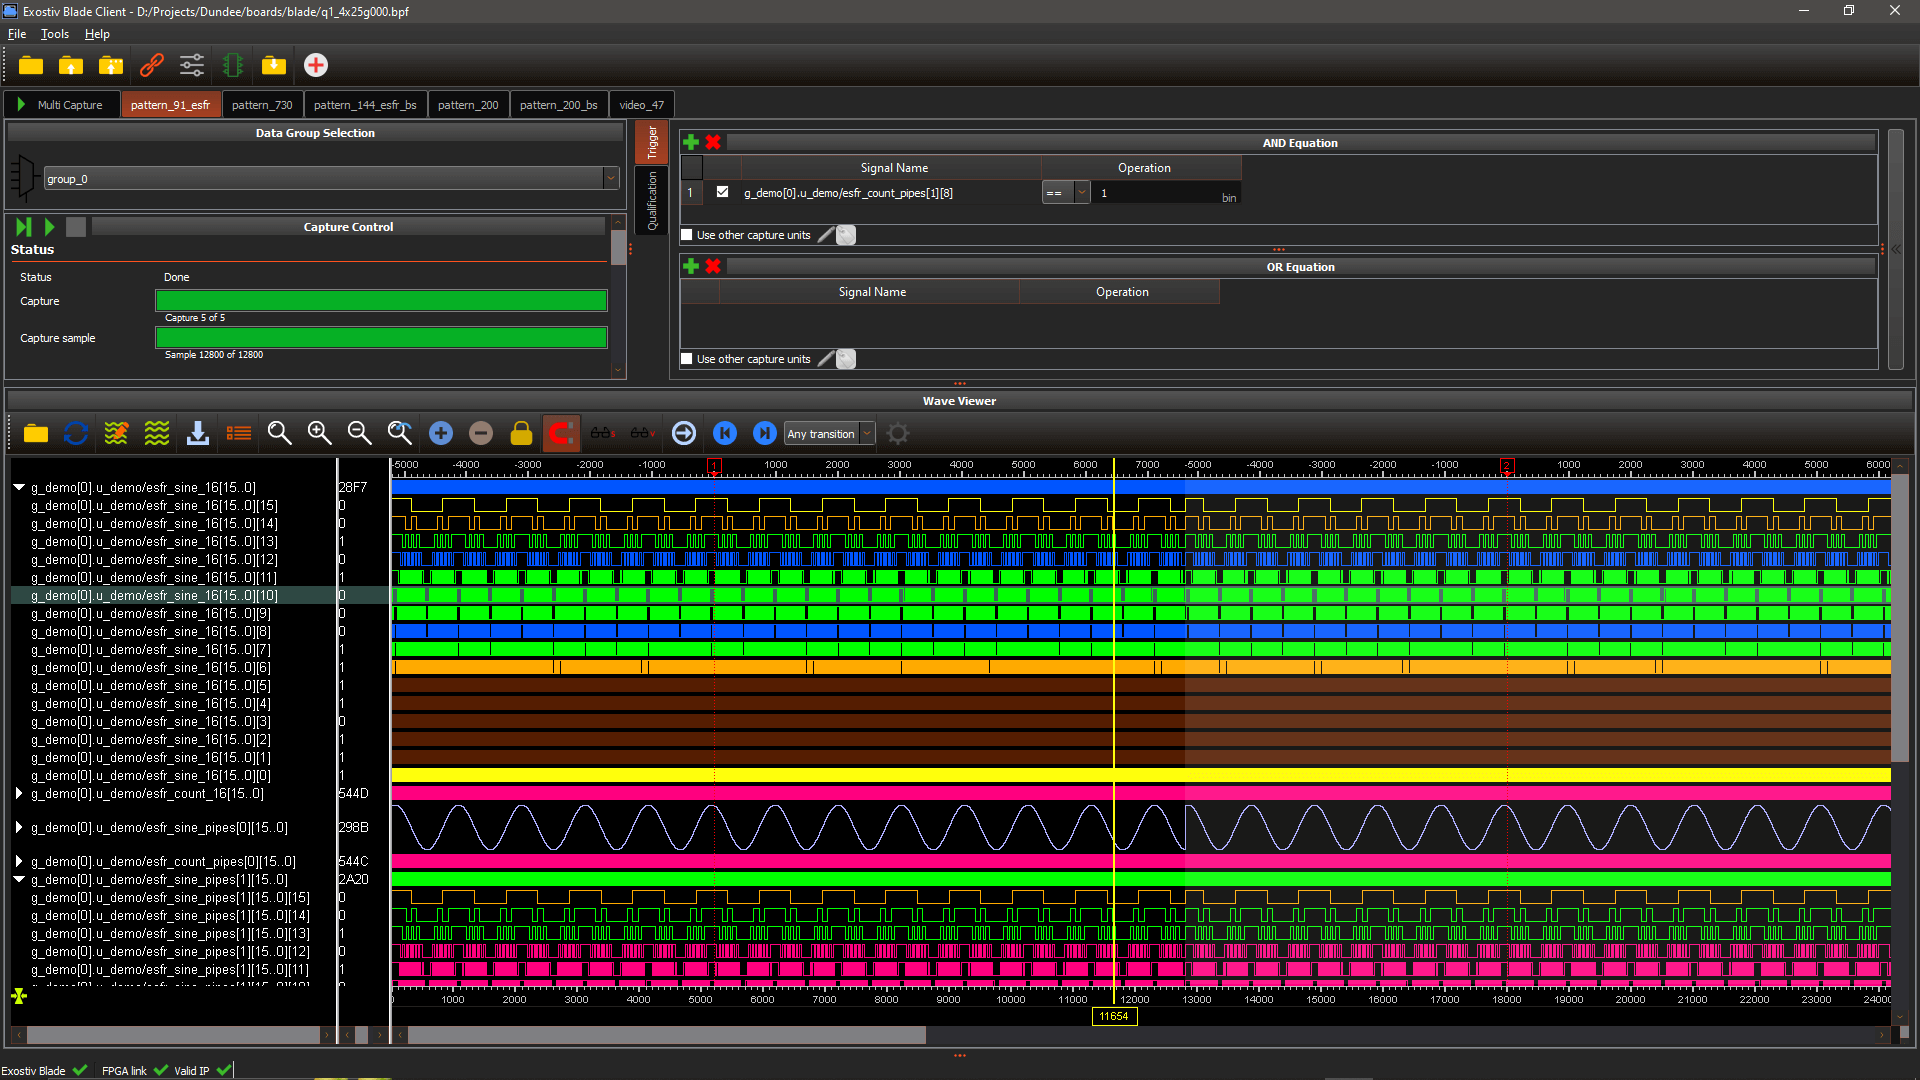
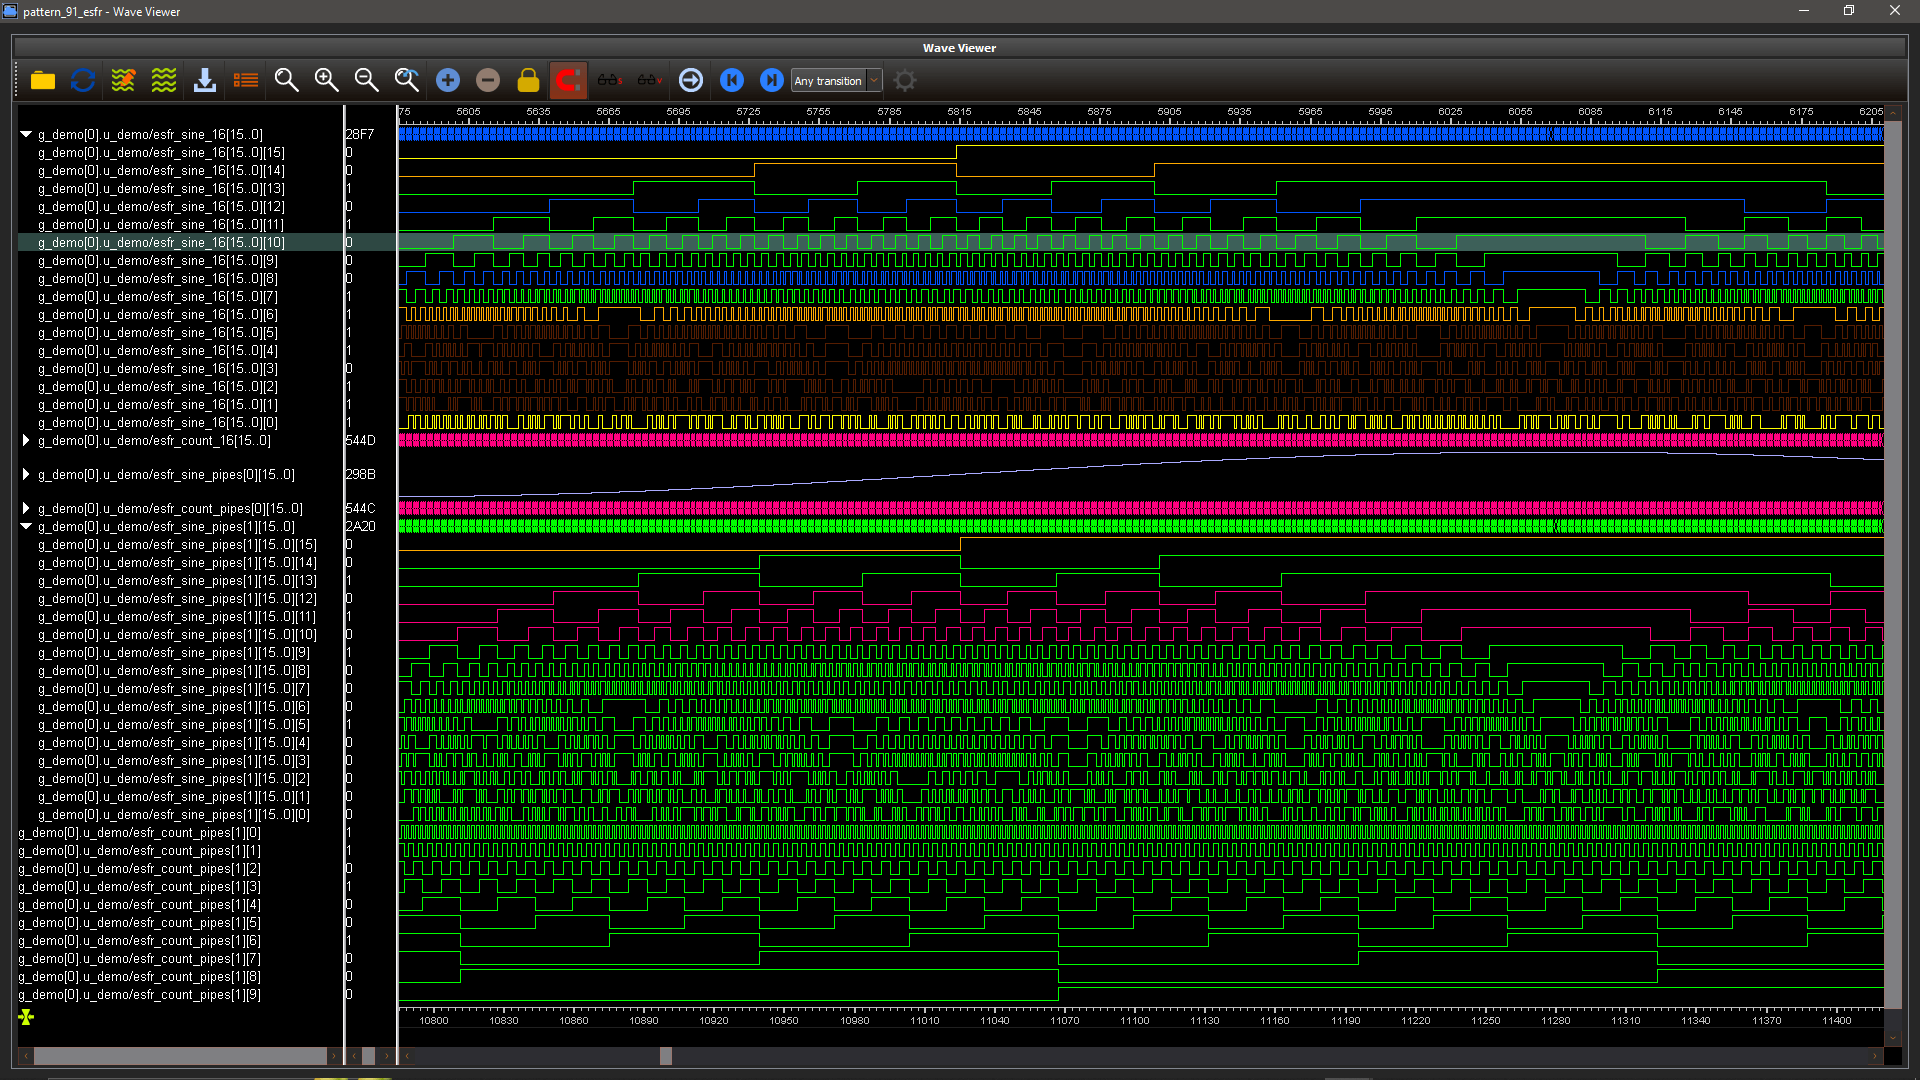
By default, captured data are encoded and displayed in the waveform viewer window. Each capture unit currently has got its own waveform viewer window.
Exostiv Blade Client integrates Myriad V2 waveform viewer, capable of displaying and browsing extended waveform database sizes. The capture databases are stored onto the Exostiv Blade storage by default and accessed over the network by the client.
To manage, copy and move the captures databases, a remote files browser is provided. To open it, click on the following icon in the icon bar:

The remote file browser window pops up:
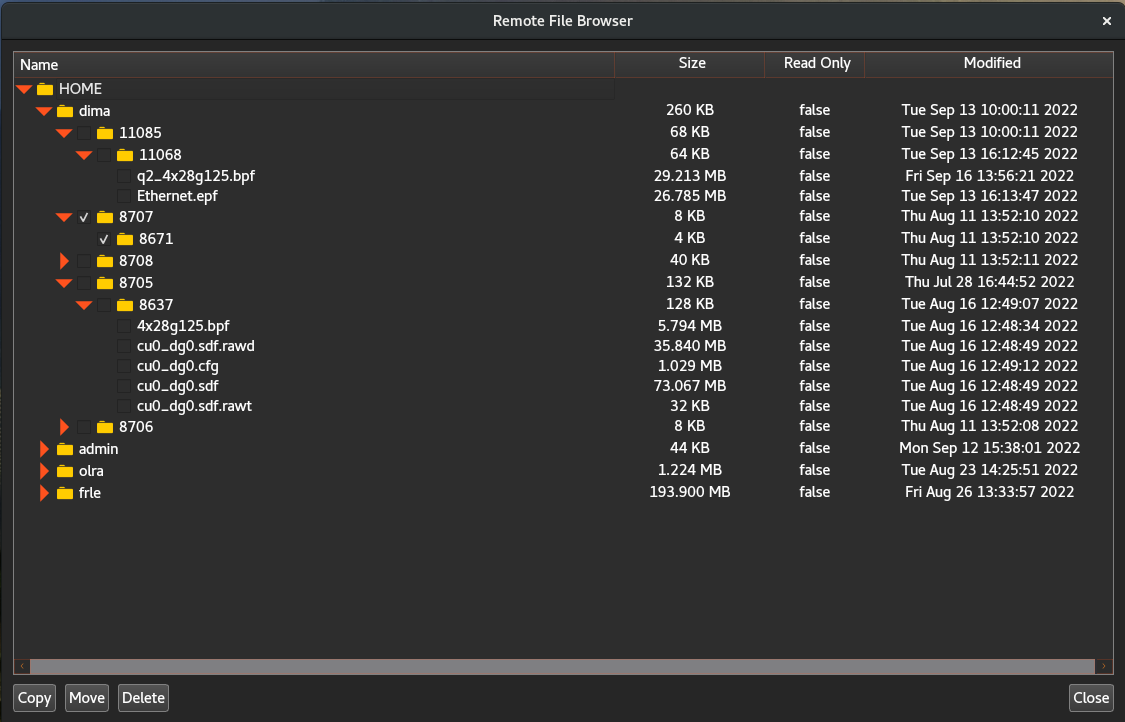
The files are stored by user and capture session. The buttons below the list of files allow copy, move and delete the databases. For instance, one user can transfer a complete capture database locally for further local analysis.