
Search
How to use Exostiv Core Inserter to enable Maestro features in Exostiv IP?
Step-by-step setup
Step 1: Start Exostiv Core Inserter and load your .bpf project file.
This article only covers the settings specific to Maestro. For the general configuration of an Exostiv IP core, refer to the Exostiv Core Inserter user guide.
Step 2: Enable cross-triggering for Maestro.
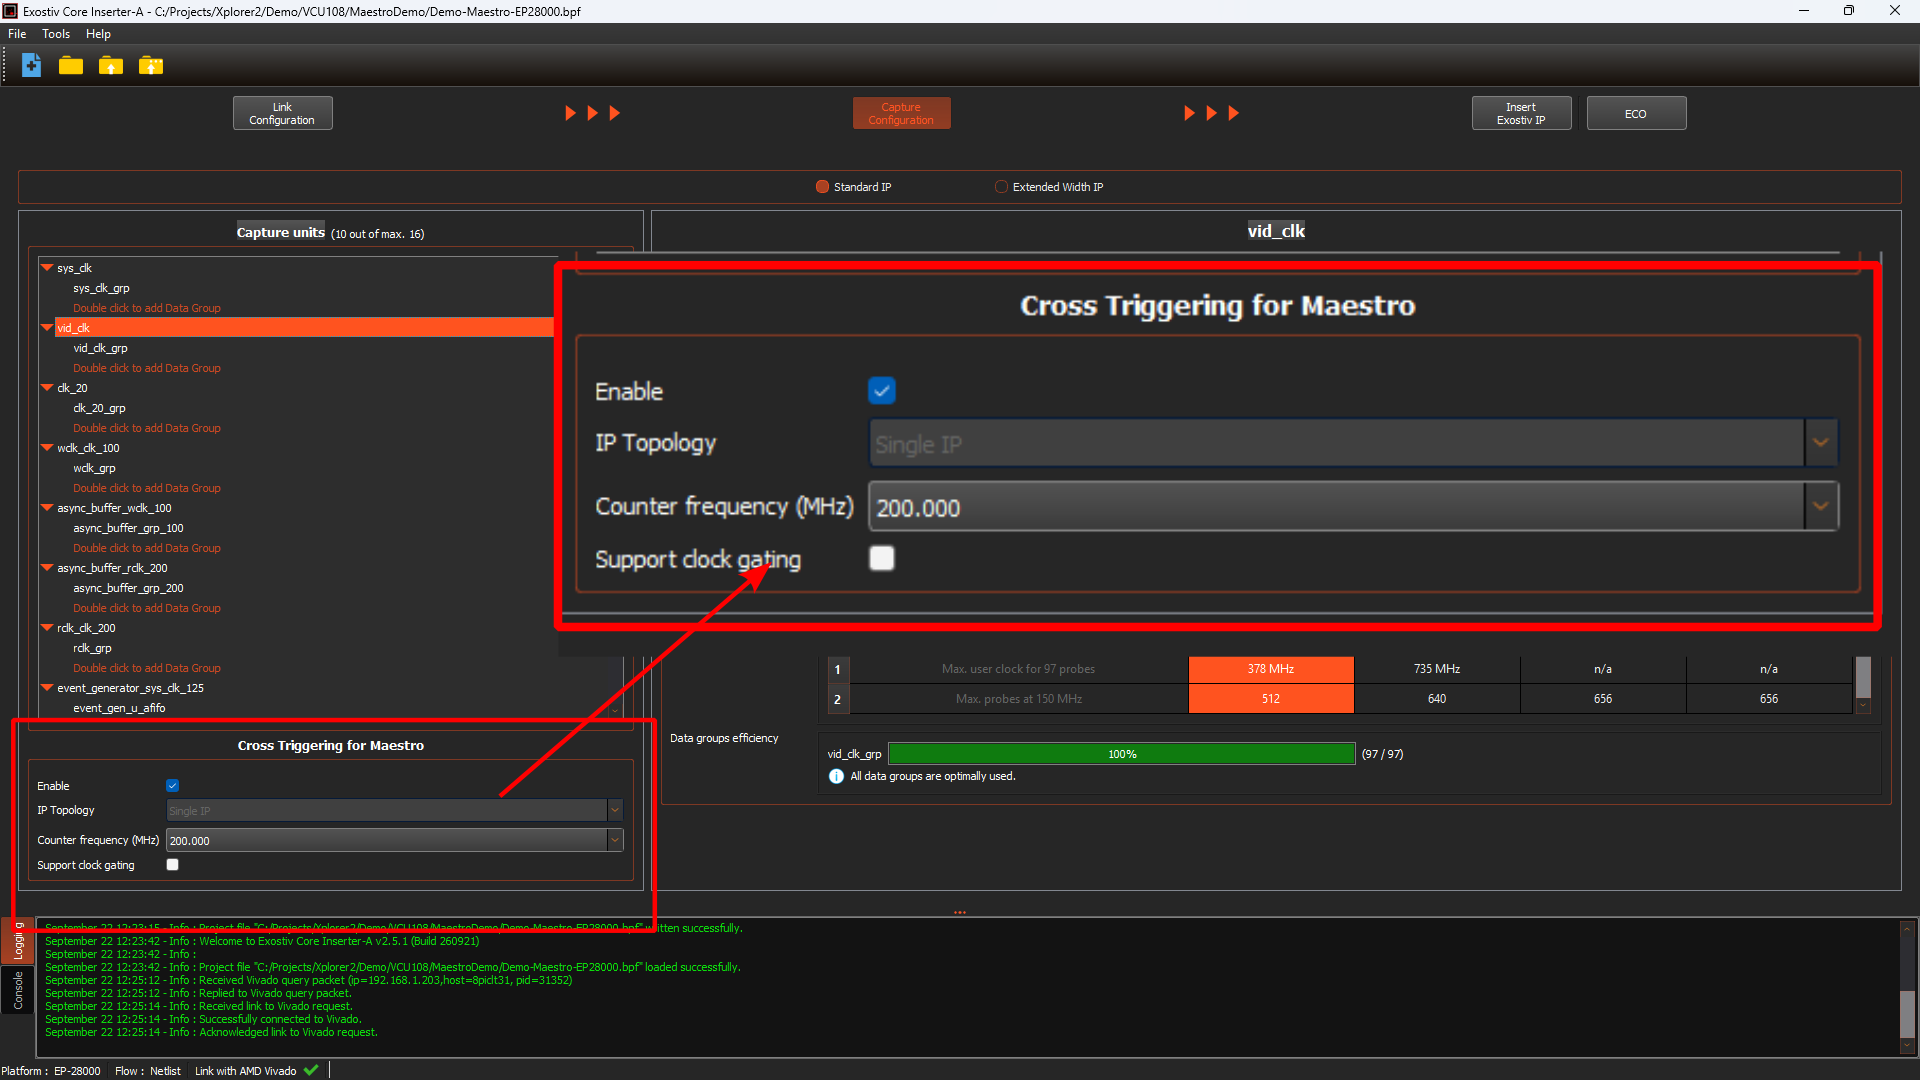
In the ‘Capture Configuration’ tab, locate the ‘Cross-triggering for Maestro’ controls.
Select the ‘Enable’ check box. This enables the IP features used by Maestro: the time reference counter and the trigger chain between capture units.
Leave ‘Clock gating’ unselected. This advanced feature is described in a separate article.
Step 3: Select the IP topology.
In the ‘IP topology’ drop-down list, select ‘Single IP’ or ‘Multiple IPs’. The available options depend on your hardware and insertion mode:
Exostiv Probe (EP16000 and EP28000) supports only the Single IP topology. Only one Exostiv IP instance can be connected to an Exostiv Probe.
Exostiv Blade models with multiple connectors support both the Single IP and Multiple IPs topologies:
- Multiple IPs is only available in RTL mode.
- Single IP is available in both RTL mode and netlist mode.
Step 4: Select the time reference counter frequency.
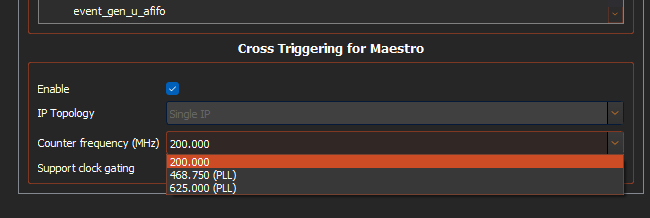
In the drop-down list, select a frequency (in MHz). The list contains:
the highest frequency among the clocks available as capture unit sampling clocks;
several frequencies that the IP can generate using an additional FPGA PLL. These options use additional PLL and clock resources in the target FPGA.
A higher frequency:
detects the trigger event forwarded between capture units more precisely;
gives a finer time resolution on the common timescale when the waveforms are reconstructed.
It also has costs:
— a clock generated with a PLL uses more FPGA resources and can make placement and routing more difficult;
— a higher frequency adds timing constraints to the design and can make timing closure more difficult.
Choose the frequency by balancing the alignment precision you need against the additional FPGA resources and the impact on timing closure.
Important: Maestro does not resample data from one clock domain into a faster common clock domain. With or without Maestro, Exostiv tools sample each signal synchronously, using the clock of its own clock domain. Only the trigger chain crosses clock domains.
Step 5: Insert or generate the IP.
Go to the ‘Insert Exostiv IP’ tab (netlist mode) or the ‘Generate Exostiv IP’ tab (RTL mode), and run the insertion or generation.
Step 6 (Exostiv Blade, Multiple IPs topology only): Repeat for each IP instance.
Repeat steps 1 to 5 for each IP instance you want to generate. Then instantiate all IP instances in your RTL code, and connect them with the trigger loop and the time reference clock. See ‘Use Maestro in multiple-IPs mode’ for details.