
Search
Maestro project setup
Opening Maestro: the Welcome Screen
When Maestro starts, the Welcome Screen appears. From this screen, you can:
- create a new project (.mst file) by selecting an operating mode: ‘Exostiv Probe’ or ‘Exostiv Blade’. Select the mode that matches your Exostiv hardware;
- open a recent project by double-clicking it in the list.
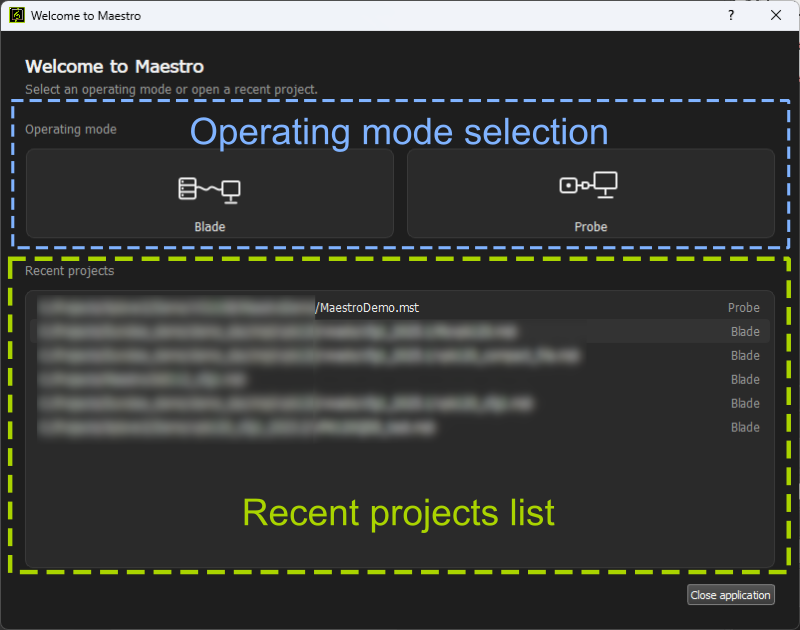
Once a project is created or opened, the main Maestro window opens. It has three tabs:

- System Configuration: specify the Exostiv hardware used in the Maestro session (Exostiv Probe or Exostiv Blade), check that it is available, and load the project files of the Exostiv IP instances to be controlled.
- Signal Selection: browse the signals connected to all Exostiv IP instances and capture units, and select the signals to capture. You can also preselect the signals to use in the trigger condition.
- Run Captures: main capture controls, including connection to the target IP instances, capture size and trigger position, trigger condition, capture start, and the waveform viewer.
System Configuration
Maestro for Exostiv Probe
For Exostiv Probe (EP16000 and EP28000), the System Configuration tab is used to specify the .bpf project file. This file contains the settings of the Exostiv IP instance to be controlled. Exostiv Probe is connected directly to the workstation over USB and is detected automatically when it is switched on.
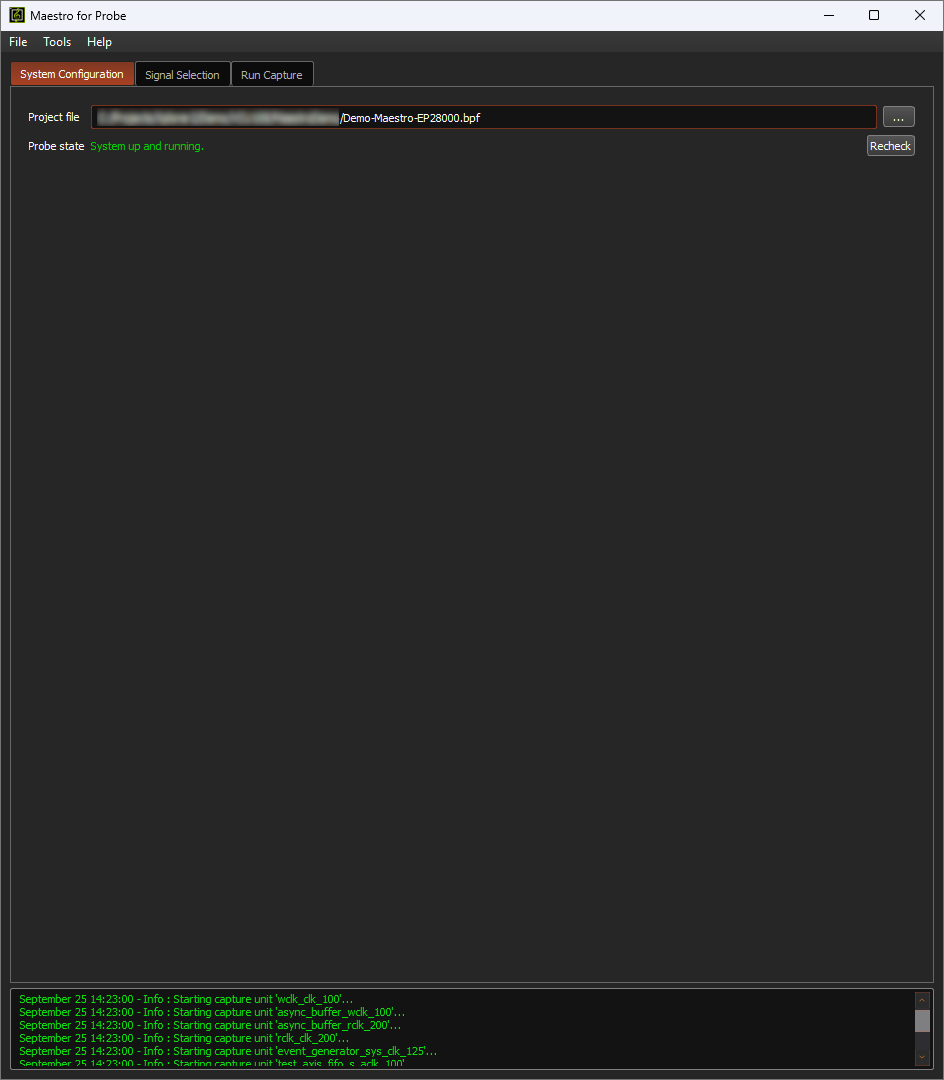
Enter the path of the .bpf project file in the ‘Project File’ field, or click the browse button.
Click ‘Recheck’ to refresh the status of the Exostiv Probe and check that it is connected to the workstation and running.
Maestro for Exostiv Blade
For Exostiv Blade, the System Configuration tab is used to select the Exostiv Blade unit, then the resources of that unit used for the capture (sessions and connectors), and the corresponding .bpf project files. It is also used to check that the Exostiv Blade unit is running and that the selected resources are available.
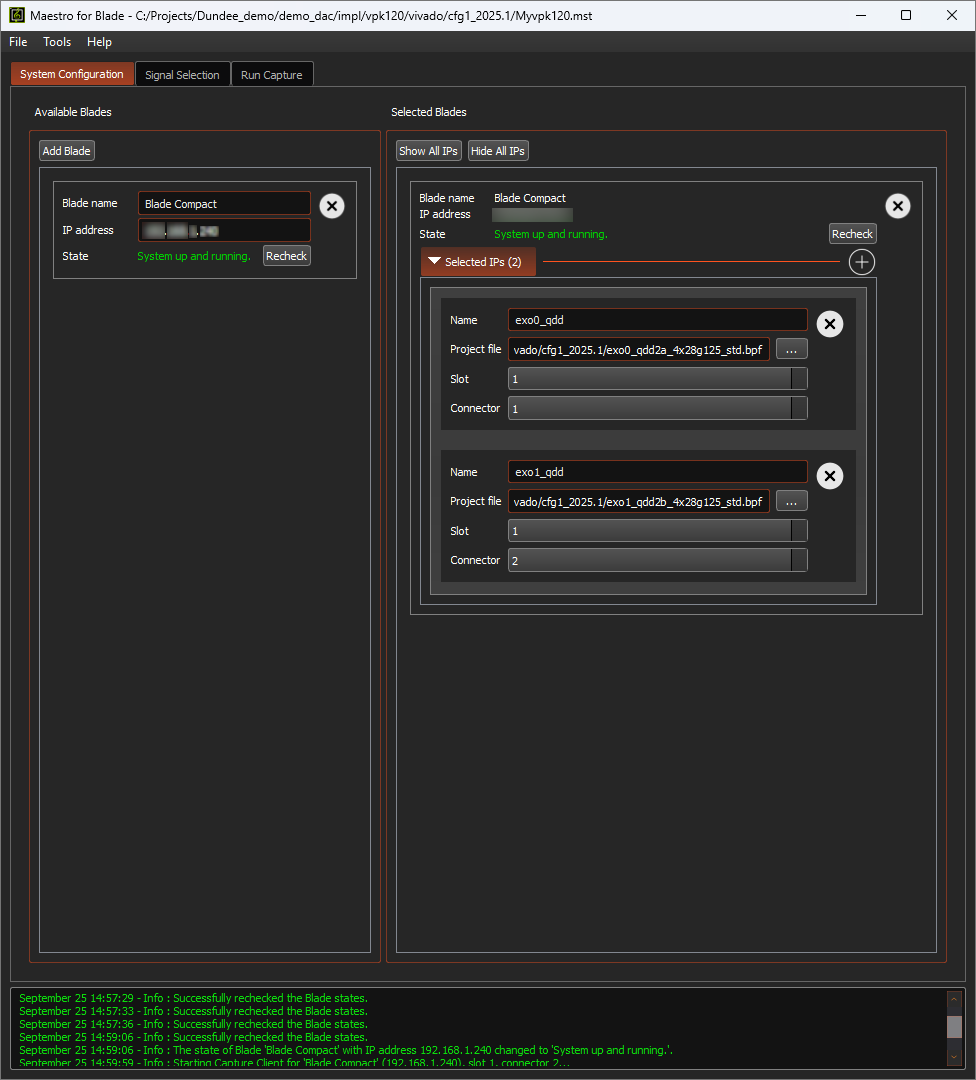
If the Exostiv Blade unit is not listed, click ‘Add Blade’ and enter its name and IP address. The unit is added to the ‘Available Blades’ list. To assign the unit to the Maestro project, drag it from the list on the left to the ‘Selected Blade’ column.
Then specify the Exostiv IP instances to include in the Maestro project. For each IP instance, click ‘+’, enter a name and specify its .bpf project file. Then select the Exostiv Blade connector connected to this IP instance, by specifying the capture board slot and the connector reference.
Click ‘Recheck’ to check that an Exostiv Blade unit is reachable on the network and running.
Signal Selection
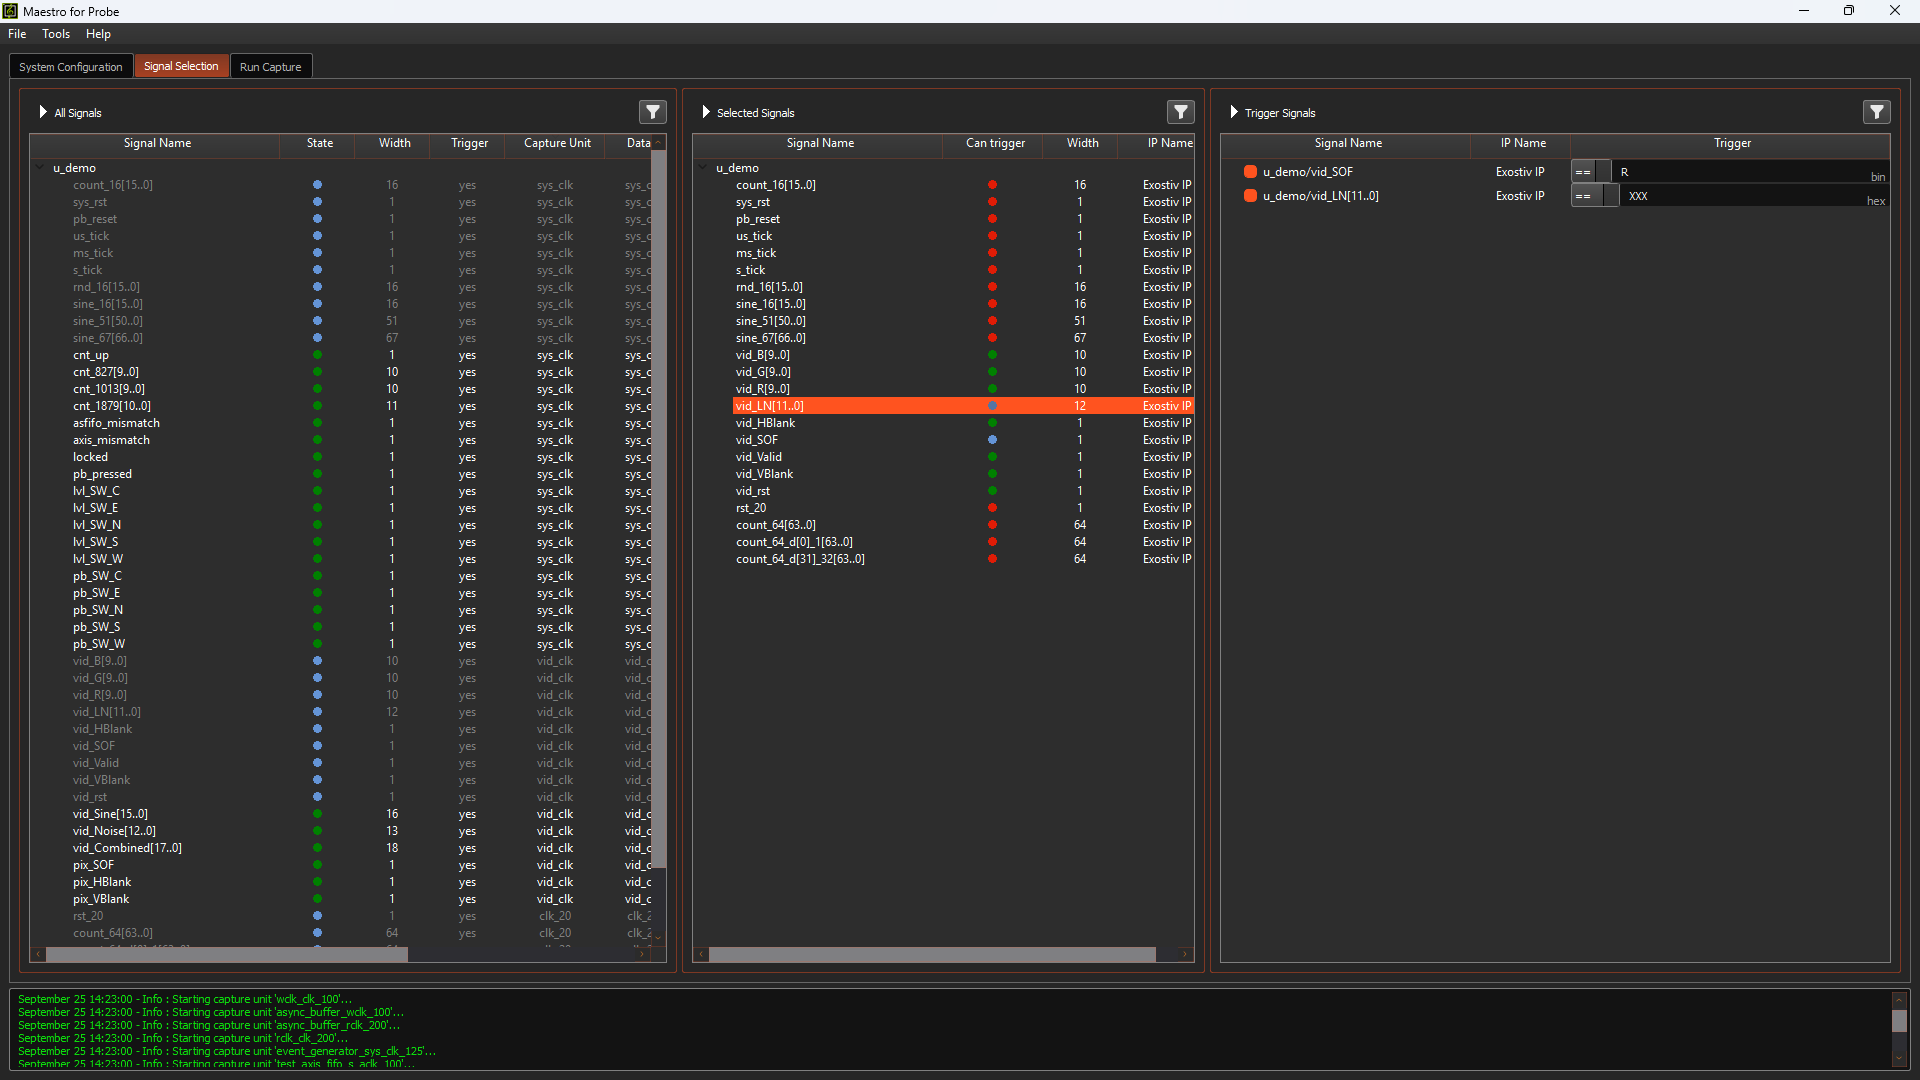
The Signal Selection tab has three columns, from left to right.
‘All Signals’ list: contains all signals connected to the Exostiv IP instances included in the Maestro project. Signals are displayed as a tree or as a list. The tree hierarchy is derived from the signal names. The list can be searched, and sorted by column.
The ‘State’ column shows a colored bullet:
- Green: the signal is available and can be added to the ‘Selected Signals’ list;
- Blue: the signal is already in the ‘Selected Signals’ list;
- Red: the signal cannot be added to the ‘Selected Signals’ list.
To select a signal for capture, double-click it in the ‘All Signals’ list, or drag it to the ‘Selected Signals’ list.
‘Selected Signals’ list: contains the signals selected for capture. Maestro captures data from these signals only, so users can limit the capture to the part of the system they want to observe. The ‘Can Trigger’ column shows a colored bullet:
- Green: the signal can be added to the ‘Trigger Signals’ list;
- Blue: the signal is already in the ‘Trigger Signals’ list;
- Red: the signal cannot be added to the ‘Trigger Signals’ list.
‘Trigger Signals’ list: contains the signals used in the trigger condition. Click the bullet next to a signal to include it in, or exclude it from, the trigger condition. The trigger signals and the trigger condition can also be modified in the Run Captures tab, so this list does not need to be filled in at this stage.
Why does the status of my signals change?
Maestro hides the complexity of the Exostiv IP instances and capture units, and lets users observe the system as a whole.
However, what Maestro can do still depends on the Exostiv IP instances used and on how they are organized. For example:
- The ability to trigger in the ‘All signals’ list (‘trigger’ column) simply depends on whether the signal was connected as data and trigger or ‘data only’ with the core inserter.
- The trigger condition is defined in a single capture unit. Trigger conditions from different capture units cannot be combined, even within the same IP instance.
- Maestro captures data in streaming mode. A capture unit that requires more bandwidth than the IP instance’s transceiver interface provides cannot be used with Maestro.
- Bandwidth is allocated per capture unit, not per signal. When a signal is added to the selection, its whole capture unit is added to the capture. As a result, adding a single signal can exceed the total bandwidth available for an IP instance.
Maestro takes these limitations into account automatically, and updates the status of the signals in the Signal Selection lists accordingly.