Search
Windows cannot install the driver automatically. What now?
When plugging EXOSTIV Probe to your PC for the first time (and powering it up), Windows might search for a driver automatically.
Actually, you have to install the EXOSTIV Probe driver manually (please make sure that you have the permissions to do so) – and point to the driver files installed together with your software.
Here is how to proceed for Windows OS:
Installing the EXOSTIV Probe USB driver
1) Connect the EXOSTIV Probe to the PC with the USB cable and power it on.
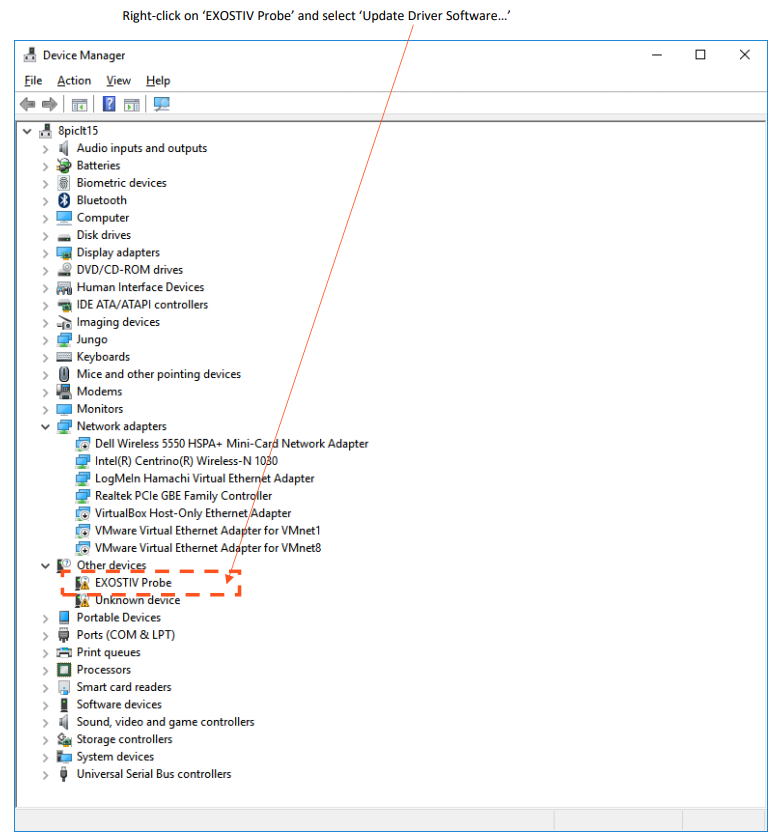
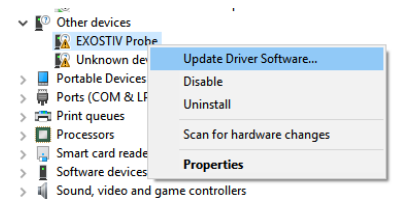
2) If you are not automatically prompted to install a driver, start Windows’ Device Manager and locate the EXOSTIV Probe in the list. Right click on ‘EXOSTIV Probe’ and select ‘Update Driver Software…’ (see below).
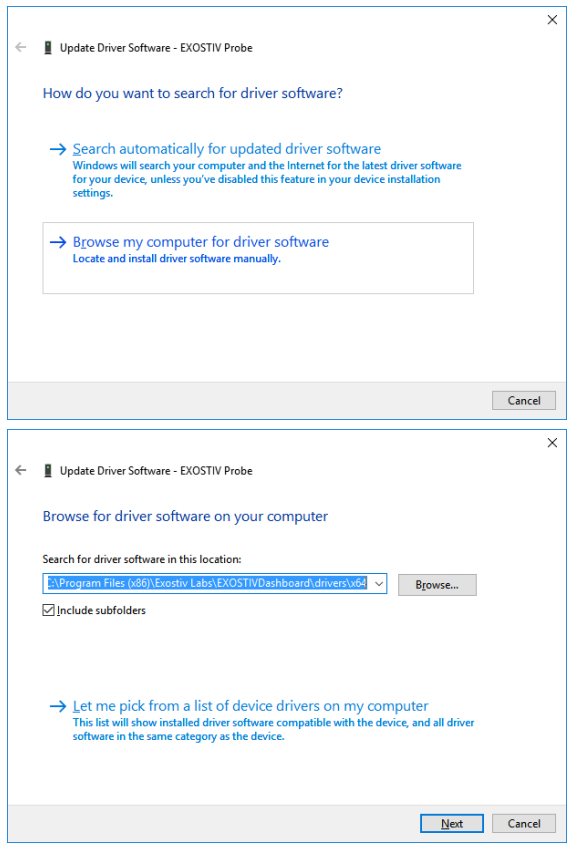
Select ‘Browse my computer for driver software’ and specify the right location of the driver – by default:
– For 32 bits Windows: ‘C:\Program Files(x86)\Exostiv Labs\EXOSTIVDashboard-(X or I)-(version number)\drivers\x86′;
– For 64 bits Windows: ‘C:\Program Files\Exostiv Labs\EXOSTIVDashboard-(X or I-(version number\drivers\x64′;
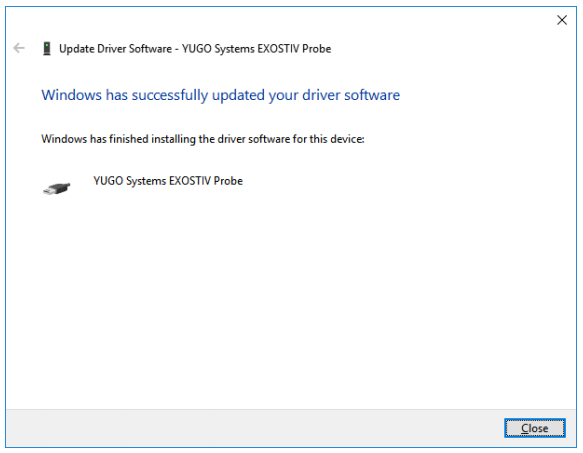
When successfully installed, the following screen appears:
Alternative source: EXOSTIV Dashboard User’s Guide at page 47.